I realize it has been a while (OK, months) since I last posted. So it seems like a good time to do some catching up. We had one last pool-related project to complete and that was to run the gas line for the spa.
It obviously wasn’t a priority through the warm summer months, but now that it has gotten “cold” (you know – under 60 degrees), it became much more important.
With the bubbles running
We’ve really been enjoying the spa in the evenings – usually about twice a week. And it was great to have when friends visited for Thanksgiving week!
We hope you all had a wonderful Thanksgiving holiday and are enjoying the holiday season! Thanks for stopping by!
Before the plaster could begin the pool had to be cleaned out, so a team of three came to vacuum and pick up debris out of the recently pumped-out pool.
Cleaned out and ready to go!
I realized this was the last chance we had to see our handprints in the concrete shell of the deck. Awww-uh!
Goodbye handprints!
The next morning the crew arrived around 6:30 am and made quick work of plastering the pool. In fact, they were cleaned up and out of here by 11 am-ish. It was fascinating to watch them work with their system of ropes tied to our cedar posts and looping hoses over them.
The pool plaster color is called aqua
The crew also cut off all the pipes and installed the water return valves.
Ready for the acid wash and to start filling!
The next day the crew came back to do an acid wash on the plaster. The acid wash allows the aggregated pebbles to come out. It gives the pool color some depth and that grippy toe feel we’ve all noticed in swimming pools.
With the acid wash completed, they emptied several containers of a chemical call StartUp Tec, which is used (as you might guess) when they start up the pool for the first time.
And with that it was time to start filling the pool!
It took 43 hours for the pool to fill. Good thing I’m a patient person (that’s a joke)….
Finally it was time for the equipment to start up and for us to attend “pool school”. I have 18 separate videos from our pool school instructor and it lasted from 8:30 am until 1:30 pm. Yikes, that was a lot to learn!
Old faithful is up and running in the pool shelf!
The water is murky, but we were told that it would clear in a few days time. There are also a few things that are missing or not working properly. The ozone filter needs something or other and the two lounge chairs for the shelf pool have not been delivered yet…. But that didn’t stop us from having our first pool party with the Strever family right after pool school ended!
Since then, the pool water has gotten clearer every day. We are responsible for brushing the plaster on a daily basis for 28 days as the plaster continues to cure, and you can really see a difference after brushing.
The water clarity improves every day
We’ve also played with the pool options on our app. Yes, there is an app for the pool. We can turn on the spa, turn on the spa bubbler, set the spa temperature, and turn on and change the lights. We’ve had some fun with the lights…
I’m looking forward to using the USA color option for the upcoming Independence Day holiday!
Cycling through the pool light options at night
And with that the pool is officially open. We are hoping to receive the shelf pool loungers soon and get the remaining “punch list” tasks completed. In the meantime, we have our outdoor dining table, couch, and Adirondack chairs all set up. Not to mention the outdoor bar….
Happy Monday and we hope you all enjoyed a great Fathers Day weekend! Since the patio and pool decking was poured and cured, we opted to have the concrete coated with a product to help reduce slips and keep it cooler underfoot.
First, the house and cedar posts were wrapped up for protection. Next they removed everything and power washed the patios. Then they put the tan base coat over the concrete.
The next day they added a textured coat that was a whiteish grey color. They also began pumping all the rainwater the pool had collected out, in preparation for the plaster to begin the next week. John wanted to save the tadpoles that had been living in the pool, but I think he was only able to save a few. Sorry frogs!
On the third day, the crew returned and put the final top coat on the patio. We like how it looks with the great room chimney and outdoor bar stone. I think this product is called Smart Deck, and we selected Houston Tan as our color. It is supposed to help creat a non-slip surface around the pool and keep the concrete cooler for bare feet.
While the pool decking was getting coated and stained, yours truly did the same for our cedar posts. We had asked our contractor about having the posts stained and I believe the price that came back was $125 a post. Well, we have 19 cedar posts around our house, so we decided that we could complete that chore ourselves. And by we, I mean me…Although John is in charge of the removal and reinstallation of the gutter downspouts.
Honestly, it isn’t that difficult and we really like how much better the posts look with stain. Besides, what else am I going to do on the weekends? Hang around our empty pool? 😜
Adirondack chairs before
The other work we completed was to haul our old Adirondack chairs out of the barn so they could be cleaned up. A big thanks to John as they were buried in the barn and he had to pull them out and pick them up overhead. And, as you can see in the picture, they were in rough shape.
Adirondack chairs after a fresh coat of paint
A fresh coat of paint made quite a difference and John will have to replace a few slats in the oldest of the chairs. But in the meantime, they are quite serviceable…
Tomorrow we are scheduled to have the plaster completed and then the pool will be DONE!!! 🤞As always, thanks for stopping by!
The last time I posted, I commented that nothing had been done in the entire month of April. Maybe our contractors saw that, because a team showed up the next day to begin creating the forms for the pool decking. As I write this (technically, began this post), ANOTHER 30 days has gone by with no progress. God give me patience, and give it to me now…
Once again, the importance of being there came up. We expanded the size of the original decking on the far end of the pool and on either side of the porches. Last September when everything was drawn up, I said I wanted a larger patio space around the pool. Our sales guy said, “oh, we can easily expand that when we get to it.” That is code for, sign the contract at this price point now and we can upcharge you for that later…
Before and after of the pool patio/decking plan
Anyway, we opted to expand the patio and even out the patios on either side of the pool. On the great room side, we plan to keep our grill so it’s out from under the covered porch. On the master bedroom side, we wanted more space for loungers and maybe an outdoor pub table. And on the far side of the pool I wanted more space for loungers or Adirondack chairs.
Marking the decking – off the wrong plans
While the sales people got the message that we wanted to expand the pool decking (and quickly amended our contract by $10,000), the contractors didn’t. I brought a set of the new plans out to them so they could redraw the guides for the forms.
They used dirt from the pool excavation to fill in around the pool. They also installed the French drains around the house and porch, and dug the footers around the exterior of the pool.
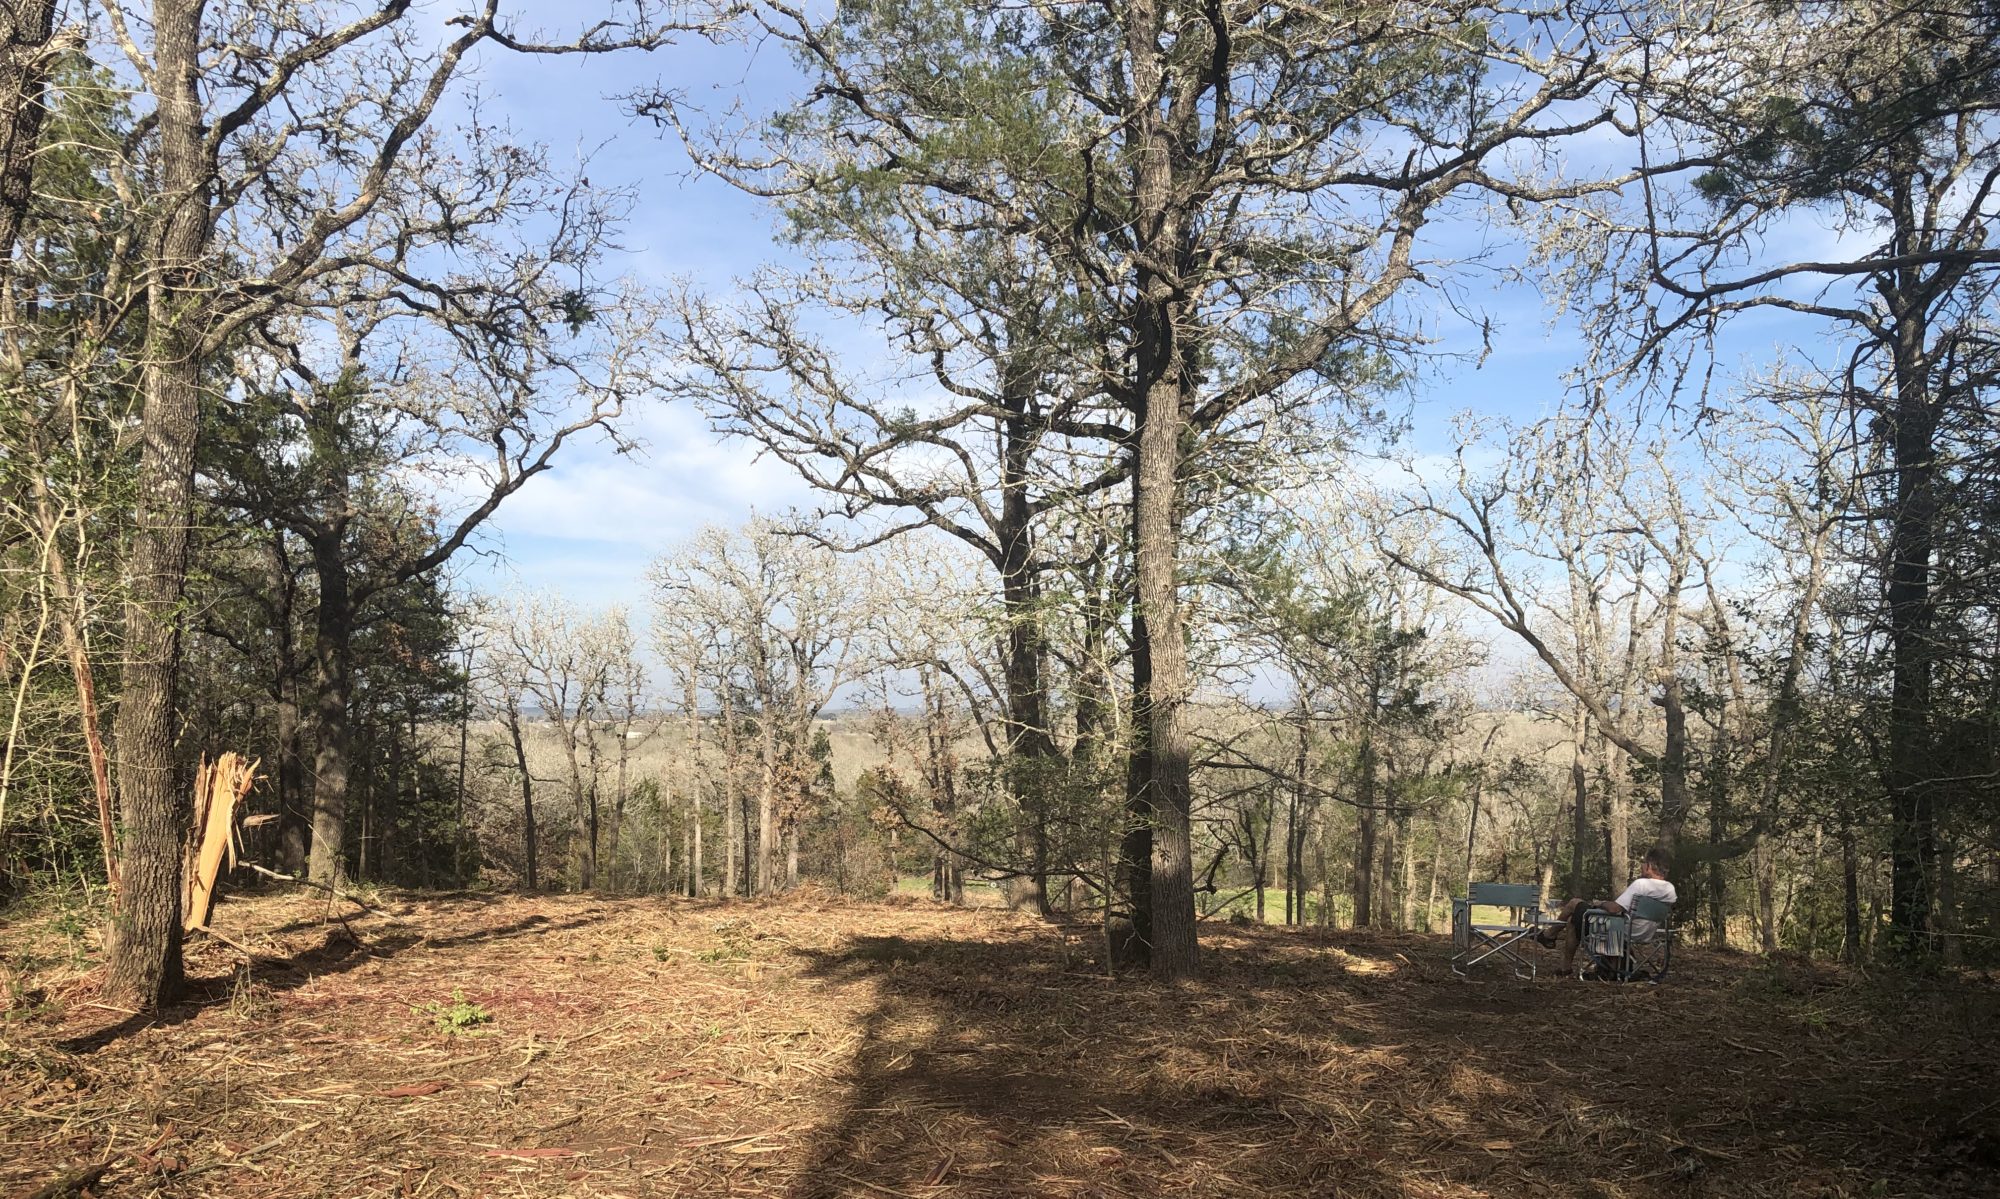
Not having a pool isn’t stopping us from catching rays…
The next week they began adding all the rebar and tying it into the pool rebar.
The pool decking getting ready!
Finally, on May 12th the concrete trucks arrived!
Hooray for poured decking!
When our foundation for our home was poured, we pushed a 2019 penny into the foundation. It was a fun ritual so we decided to repeat it this round with a 2021 penny (wow, time flies!).
Robert was also documenting the penny installs
Checking on the penny
Adding our 2021 penny off the master bedroom porch
The newly poured pool decking came at a great time as John’s brother Robert was visiting and we hosted cousins and extended family during his visit.
Many of the cousins hanging with brother Robert
The concrete decking around the pool was a very LARGE improvement for us. We track much less dirt and sand into the house and it’s so much more comfortable to hang around the empty hole that will someday (soon???) be a swimming pool.
So that’s our pool decking update. A new post showing the smart deck coating installation will be coming soon. Until then, thanks for stopping by! Hugs, Libby
Hello friends! Earlier this week we had a Zoom chat with our friends Julia and Bob and Julia, being the true friend that she is, gave me a “talking to” about how long it has been since I updated the blog. “Oh, it hasn’t been that long,” I protested. Only more than 2 months since my last post, as it turns out. Ooops.
So my apologies to everyone (although I doubt any of you lost sleep over the lack of updates) and thanks to Julia for the kick in the rear.. 🙂 The photos in this post go back through April and March to February 27th when the plumbing and equipment were all installed.
Digging the the tunnels for the pipes
That’s a lot of pipes!
They made quick work of getting all of the equipment including the pool filter, the heater, and the ozone filter installed. We “hid” the equipment on the south side of the house, off a storage room at the end of the great room. Having grown up with a pool, I know that the heaters and filters can be noisy (I’m guessing these new units are more efficient and silent than I remember), but still. I like that they are tucked away and not in view.
Meanwhile, John “helped” by hovering where they dug so he could hunt for arrowheads…
John, the artifact hunter.
So all of the above took place on February 27, 2021. Then, on March 3-4, we had a group of 25 people from all over the world descend upon us to “shoot the pool”.
The crews were assembling
Turns out we had a world expert on shotcrete here in LaGrange, TX to teach various crews how to spray liquid concrete (or shotcrete). Oscar lives on an organic blueberry farm in Sonoma, but his main job is traveling the US doing commercial concrete work. He rarely does residential projects and one of his most recent projects was refurbishing underground tunnels out of the US Capitol.
John talking to Oscar
The other crews were from Northern Texas, Arizona, and as far away as South Africa! They began by wrapping up the house so random spray wouldn’t damage the porches.
Nothing to see here!
Then the spraying began…They started with the spa and went into the rest of the pool.
There were always at least 2 guys holding the hose at any point. The nozzle alone weighed 75 pounds. The pressure through the hose could be regulated and they generally had it spraying at a level 1 or 2. John asked, what would happen if you turned it up to a level 4? Oscar told us that it would lift a man off the ground and he would be flying in the air like a cartoon. 😳
The concrete is done!
Before the concrete fully cured, John and I put our hand prints into the pool ledge. No one will see it after it gets plastered with the PebbleTech, but it was a fun touch for us at the end of the process.
Next came tile and coping (the top stone around the pool). I had forgotten what we had selected last September when we signed the contract for the pool, so it was fun to see the tiles and stones in person.
First they added the tile at the waterline on March 24-25, 2021.
I’m glad I still like the tile we selected back in September.
Then the travertine stone coping was installed along the top edge of the pool and spa.
The travertine looks good with the stone we have on the outdoor chimney and bar
And finally, they cut some of the blue tiles to be installed along the benches and steps. I thought that was a nice touch and offers some visual interest and helps everyone to see where the steps are located.
So that brings us up to date on the pool progress. Sadly nothing, and I mean nothing, has been done for the entire month of April.☹️ Pool and other construction projects are in such demand that they cannot get crews out to finish the work concrete decking or plaster work. Thankfully, the deck forming is scheduled to begin this next week so we will get back on track soon.
Progress thus far
Sorry for the epic post and if you’ve made it this far, thanks for stopping by.
Wow, what a difference a day makes. Actually, what a difference a week makes! Last week at this time we were worrying about freezing temperatures, losing power, losing water, and generally staying sane through Snovid-21.
Last week vs today
Today we started building a swimming pool! And it was 74 degrees. Crazy…
The pool sketched out
On Wednesday, February 10th, our contact with the pool company, Sam, and our site supervisor, Fernando, came and sketched out the pool we designed last year with spray paint. It gives the home owner a chance to see the pool in the space. Thank goodness we had that time, albeit covered with snow, to do just that….
The tanning ledge was going to be really tight with the 2 in-pool loungers there. So we expanded the pool so there is more room to walk around those loungers.
…because we realized that the tanning ledge/Baja shelf was going to be way too small. So we called Sam and Fernando and expanded the pool from 15’x37’ to 20’x40’ (including the spa and tanning ledge).
Today they came and staked everything out, measuring multiple times in multiple ways to make sure the layout was square and perfectly centered in the courtyard. Expanding the pool obviously reduces our pool “deck”, but there are still 8’ of space on either long side and 10’ of open decking near the kitchen (not counting the covered porches) – plenty of room for loungers.
Then the digging began. After every pass of the Bobcat, John went out looking for tooled artifacts, arrowheads, and the like. I think he’s the stone whisperer…
The team was gone and cleaned up before 4:45 pm. Boom – day one of the build is done!
All in a day’s work
I’ll continue to post progress on the pool as we go. Until then, thanks for stopping by!
First, I want to begin by saying thanks to all those friends who reached out to check on us the week of February 15, 2021. It felt like John or I had a birthday – we received so many texts, calls, and emails. So thanks for checking on us. It’s been a weird week.
The past few weeks we’ve had beautiful, spring-like weather. In fact on January 22, 2021 I worked outside in the sun on the pool porch. I even had to move because I was getting too hot. Ha!
Working in the sun
This week…. not so much. In fact, we had planned to go to the Texas coast for a long weekend get away for John’s birthday and Valentine’s Day. It would have been our first trip (albeit by car) since we went to the Cayman Islands last year for John’s birthday and Valentine’s Day. But as the weekend neared and the storm predictions got worse, we cancelled our plans and stayed put. Just as well – we had a number of chores to complete before the storm including covering up our garden beds, wrapping the water pipes down by the water well and pump, and gathering firewood for the weekend.
covering garden beds and harvesting vegetables
Yes, we did lose power, but not for very long – especially compared to others. We also briefly lost hot water, but John climbed into the attic and did his McGruber thing to fix that before the day was out. Our local paper called it a “once in a lifetime storm” and the Texas Governor called it “a once-in-every-120-year cold front”. I think that is fairly accurate considering the following records that were broken this week:
For the first time in recorded history, all 254 counties in Texas were under a winter storm warning.
For the first time in recorded history, the National Weather Service out of Austin/San Antonio issued a wind chill warning.
Austin channels say the area broke the record for the longest period of time with temperatures below freezing (previous record was 140 hours).
making the best of a bad situation
Construction was supposed to begin on the swimming pool this week, but obviously with the freezing weather, that was postponed to sometime next week when we get back to “normal” temperatures.
the pool is staked out
We hope you are all doing well and have been weathering the winter well. Be on the lookout for posts about our pool construction, which will begin soon! Until then, stay safe and thanks for stopping by!
It’s finally moving day week(s)! There are a few things on the punch list not complete, but the house is ready for us and our furniture. Let’s take a look before we clutter it up with boxes!
Walking in the front door living room windows dining room Butler’s pantry ilve 48” rangemud room Librarymaster bedroom master bedroom fireplace master bathroom outdoor kitchen antique Egyptian doorsthe great roomgreat room barBar bath
I actually began this post on Friday, September 18th, and it’s finally getting posted two weeks later. Moving is hard work!
We are slowly getting settled into the house – pics of the place furnished will be forthcoming. I began this blog one year ago and would like to thank everyone who has been on this journey with us. It took longer than we expected, but it was worth it in the end… Every morning John and I comment that it looks like a postcard when we walk out into the living room.
Our view this morning from the living room
We hope you continue to stay safe and healthy. As always, thanks for stopping by!
Whoever came up with Murphy’s Law probably built a house… Last week we went through a punch list with Wesley, our site supervisor. If you aren’t familiar with a punch list, it’s where you list all the things that need to be repaired or fixed. Most are small, some are not.
One thing we noticed were the seams between drywall panels going down the hallway. They were really noticeable and even our site supervisor said he wouldn’t want it in his house. This required that the entire hallway be taped off, re-mudded, textured, primed and painted. Not a small job.
Re-texturing the hallway
The living room fireplace mantle was installed over the tile. I had a very detailed sketch done, but somehow managed to order two less of the blue 2X4” tiles than we needed. HOW? No idea… (See my sketch below) We also decided to bring the hearth out two more rows so it will be 18” in depth instead of just 12”. Tile has been ordered and it will be completed after we move in.
The tile with 2 missing piecesLiving room fireplace almost done
The master bedroom fireplace has not gone as smoothly. We had the frontispiece repaired and it looked great.
Repaired soapstone
And then the installer dropped it and broke it in a new place… What are the odds??
How many times is this thing going to get broken?
In the master shower they realized we needed a second valve for the hand held shower wand. So out comes the shower tile so the valve on the right can be installed.
More construction by tile and error
Zach, the cabinet guy, came back and installed the cabinet doors on several of the appliances including the under cabinet refrigerators, ice maker, and dishwashers. I like the built in look it creates.
But alas, not all was smooth sailing. The kitchen dishwasher didn’t have the necessary hardware to install the doors. After a phone call Bosch will now send those brackets and screws directly to us.
Similarly, on Friday our new washer and dryer were delivered, but without all the parts ordered. This meant that the installation we paid for could not be completed. More phone calls ended with the appliance retailer saying they would send me the LP (liquid propane) gas conversion kit which is necessary if we want our dryer to actually work…
New washer and dryer to be installed – as soon as we get the parts we ordered…
Finally, we had satellite internet installed and it actually doesn’t suck (praise indeed, right?). But the installation guy put the dish right in front of our laundry room window. What the heck, dude? Thankfully we can have it cut down and lowered, but seriously?
Seriously Hughes.net?
Our timeline to move in has been thwarted again. My too-frequently asked question this week was, “why can’t things just work like they are supposed to?” Momma said there’d be days like this. Weeks too. Who can relate?
This week….
But I’m sure it will all work out, right? Right??? We are so close to being done that it’s making me a little crazy. John says it’s the frustration that comes with impediments to goal attainment. I think that’s a fancy way of saying that after more than 11 months of construction, my patience is wearing thin. Anyway, assuming there are no more blunders, our site supervisor now says we *might* be able to stay the night Sunday night. Hmm.
Packing up our rental house Friday night
We hope you all continue to stay safe and sound. Let me know what you think of the house thus far. As always, thanks for stopping by!
Hey peeps, if you have been hanging with us this long, you may well know that originally we were supposed to be moved into our house by May 1, 2020 (I’m writing this on September 4, 2020). Then it looked like maybe July…. then definitely by August 31st. Then Labor Day weekend (ahem, that would be this weekend). Now we are scheduled for Friday, September 11, 2020…. While I am hopeful, I have not called the WIFI people to reschedule them… again.
Laundry Room
In the meantime, our painters came back for touch up and final clean up – including staining and sealing the new butcher block counter in the laundry room. I’ve always liked the look of butcher block, but was concerned about the upkeep in a kitchen. Here in the laundry, it will see much less wear and tear and adds a nice warmth to the white cabinetry.
Can lights and A/C grates painted
Our painters also painted the can lights in the ceiling as well as the A/C grates. This was an extra cost, but I really like how they are much less noticeable on the bead-board ceiling in the great room. Just feels more finished to me.
Before power washing
And the painters power washed all of the cedar posts outside on the deck. It may seem like a small thing, but some of the posts had been strapped together and aged in the sun – and the resulting dark stripes looked dirty to me. Am I being picky? Don’t answer that….
After power washing
The mirror and glass people also came and installed the master bath shower door (above)… as well as the bar bath shower surround (below).
They also installed glass in the upper cabinets, along with all the glass shelves in the butler’s pantry and bar.
And the mirrors went into the master bathroom…
The butler’s pantry…
And the bar…
Today the plumbers were there, installing the rest of the faucets and dishwashers. I wanted to tell them to forget about the dishwashers and get the craft ice maker installed…. But I held my tongue.
Yea for appliances!
So the game plan is that we will get the cabinet hardware installed Monday, appliance panels will be installed on Tuesday and the painters will finish on Wednesday. And somewhere in there the tilers are supposed to come back and finish some work as well.
Mantle is stained
So wish us luck this next week that we actually can move in. We hope you are all enjoying a lovely Labor Day weekend and thanks for stopping by.
That’s right. We’re getting close. The wood flooring and the shoe molding are done!
It took a while to get the flooring acclimated to the A/C, and quite a while for them to install the floors. Nine full days of them installing the wood flooring in fact.
The wood flooring we selected is a hand scraped American Hickory with a Chestnut stain. I think it is beautiful and the lifetime structural warranty combined with a 50 year finish warranty is just the icing on the cake. It was one of the first finishes we selected last fall, so it’s nice to finally see it get installed!
Great room flooring Dining room and kitchenMaster bedroom My office Living room Library Close up of the shoe molding
While some of the trim will be painted white, other pieces against the cabinets will be stained beginning next week.
The shoe molding around the bar will be stained
So with the flooring in place, the appliances can be moved in and our painters will be back beginning Monday for final touch ups… As gorgeous as the floors are, I am excited to get our oriental rugs out of the barn and into those rooms!
We hope you and your families continue to stay safe and healthy. And, as always, thanks for stopping by!
We’ve had a variety of plumbers in the house, installing sink and tub faucets. It’s been quite a while since we’ve seen our sinks or countertops so that was a fun change!
Kitchen sink and faucet
They also installed the butlers pantry sink and the stopper. Still waiting for them to replace the drywall that was damaged from the “tile and error” style work done here, but I’ll be patient.
The guest bathroom vanities have been plumbed, but not the showers yet.
Guest bathrooms
And it was nice to see the bar countertops and copper sink again.
Yes, that is a glass of white wine…
And finally, they began working on our master bathroom. Again, the shower fixture was not installed, and our site supervisor guessed that they ran out of time.
I was oh so happy to see our tub installed!!
Same glass of white wine… 🍷 Even John likes the new tub!
They still have to install the outdoor kitchen faucet and the laundry room faucet, in addition to all 3 showers. But progress is progress these days, especially when we are hoping to move in by the end of August…
The details will all get taken care of, right??
Who’s taking bets on whether we can move in by the end of August (as I write this on Lauren’s birthday – 8/13)? 😅
Too true…
We hope y’all are doing well and thanks for stopping by to see our progress!!
With power installed and hooked up to the house and barn, the electrical crew came back to install outlets, switches, lights, and fans.
We are lucky that we almost always have a breeze across our front porch. But last night we were able to augment that with some man-made breeze thanks to all the fans on our various porches.
We also were able to hang out in various rooms in the house – after dark!!! Here’s our living and dining room…
And the kitchen and butler’s pantry. … We have dimmers on several of the lights, which is why the kitchen island lights look different in the various pictures. We will be installing more dimmers (only 6 were included in our contract) but since they charge $40/dimmer, John will be doing that himself later.
Lights are up in the master bedroom and bathroom too!
And we enjoyed spending time in the great room as well.
Not everything is done, of course, but we are very happy with the recent progress. There are a few light fixtures that we own that they will not install – the electricians say they need to be rewired because they are antique. And there are a few that I cannot find, despite digging through the barn loft multiple times (grrr). But thankfully, John can install those later as we get down the road.
outdoor kitchen
Next week the plumber will arrive to hook up water and install the faucets and shower fixtures. We are getting closer and closer to being done!!!
I won’t go into the harrowing and horrific story of why our journey to get power took so long (almost 8 full months), but I will say that I won’t look at some neighbors the same way again. But in the end, we have power running to the house…
Once the A/C guys arrived, the air conditioning began – a necessary step before hard wood flooring arrives to get acclimated later this week…
We cannot hear these running from the front porch – they are so quiet!
Electricity was also run to the water well pump and to the barn.
In addition to getting electricity, we also had our liquid propane tank installed and buried.
With utilities installed, the rest of the house can be finished and our builder says we will be done and ready to turn our construction loan into a home mortgage in August. Hooray!!
The meter is already running!
Thanks for stopping by and we hope you are all staying safe and healthy.
This week we began focusing on the fireplace surrounds as the bathroom tile work is wrapping up. Ironic, since it will 100 degrees Fahrenheit today…. Beginning in the living room, the hand glazed tiles for the fireplace surround were ordered in early June, but won’t be shipped until late August. Darn! I ordered the art tiles (below) along with the color glaze samples back in May and received them the next week… so I assumed (mistake #1) that the other tiles would be shipped quickly as well.
Art tile for the living room fireplace surround – the rolling hills mimics our view of the valley
Alas, because of COVID-19, Motawi Tileworks in Ann Arbor, Michigan, was shut down for two months, putting them behind in fulfilling orders placed in March and April. So I must be patient… which is not my best virtue… You can see examples of tile installation of the Pine Landscape tiles at the Motawi website here.
Hand glazed tiles from Motawi Tileworks And our living room fireplace mantle
In the master bedroom, we have the tile. Well, most of it. We are missing one corbel that somehow fell off the frontispiece. The same frontispiece that broke in half when it was being taken down from the cottage fireplace… but I digress. Anyway, at our lake cottage, which was built from 1932-1938, we remodeled and replaced the old living room fireplace that no longer functioned and took down the old carved soapstone from its surround to create a larger firebox.
Master bedroom fireplace surround – carved soapstone circa 1930’s
Now we are trying to put humpty dumpty back together again, but in our new master bedroom. Thankfully, our tile installer, Roel, said he was up for the challenge. Thank goodness someone is… They are going to have the frontispiece (that’s a fancy word for the carved part that is right under the mantle) repaired and I’m hoping to have the gold etchings re-gilded or gold leafed. I’m not sure how the repair will turn out, but I’ve been interested in the Japanese art of kintsugi, otherwise known as golden joinery. The idea is that you highlight the repair with gold leaf, rather than trying to hide it, and it becomes part of the story of the piece. Since these carved soapstone pieces will be in our master bedroom, we may opt for the kintsugi design aesthetic if the repair is too obvious.
To be repaired…. and I’m hoping we find the other carved corbel.
Finally, we come to the fireplace in the great room. Here we have the largest fireplace, with the largest chimney and largest statement – Oklahoma fieldstone. These are real pieces of stone. This ain’t no “lick and stick” stone veneer like we used at our previous home, the lodge.
The “lick and stick” stone veneer at the lodge and our pile of Oklahoma fieldstone
Beginning outside, they installed stone on the outdoor kitchen bar, which we think will look really nice with the counter tops. When I first saw the stone being installed, I wasn’t so sure about the look, but once the grout was cleaned up, I was sold.
They also installed the stone on the outdoor chimney, creating a nice focal point on the pool courtyard.
I like how the two outside stone walls work together on the pool porch.
And finally, the same stone was installed inside on the great room fireplace. This is also the only room where we created a raised hearth.
While visiting the site last night, we decided to see how the great room fireplace mantle looks. There is a crazy story behind this mantle! I won’t go into the details now, but this is a piece of wood out of a century old barn in Ohio. I think Mark, our paint and stain master, wants us to simply seal the mantle, but I think it needs to be stained so there is some contrast from the stone. It also needs to be cut to fit.
What do you think of the three fireplace styles? Which is your favorite? I would love to hear your feedback. In the meantime, stay well and thanks for stopping by!
This is our first Independence Day in Texas and the first time in a decade that we don’t have a houseful of guests. It was so quiet, especially since Smithville, where we are currently living in a rental home, has a zero tolerance policy for fireworks in the city. I found that I was very nostalgic and a bit homesick for fun on the lake.
Good times at the lake cottage
But, as previously mentioned, it just isn’t worth keeping a lake cottage 1,000 miles away. We wouldn’t get enough use out of it to warrant the costs and we aren’t allowed to rent it out because it is on the city’s water source. Thankfully it is under contract to close on or before August 14, 2020.
Too bad it’s so far away from our home in Texas!
In the meantime, work continues at our forever home, including the installation of our new septic system and heat pumps.
Necessary infrastructure going in place
The foundation of the house was also skim coated, which is technically known as parging. It’s not required by code and is essentially decorative, making the foundation of the house and porches nice and smooth.
And with the parging completed, they added dirt and graded around the house, minimizing the big drop offs from the porch.
And tile continues to be installed, thankfully without any further mistakes. I really like how the bar bathroom shower turned out.
bar bathroom and guest bathroom tile
I hope you all enjoyed your Independence Day, however you celebrated it. We began packing our rental house – quite different than any holiday we’ve had in the past decade! Thanks for stopping by!
Progress has continued on the ranch, even if it feels slow at times. And since our lake cottage is under contract (woo hoo!), we need to get back to the Midwest to pack up the cottage’s dishes, books, as well as our furniture, rugs, and art. Unfortunately, we continue to find that we need to have eyes on the build as mistakes continue to be made.
Umm, a mirror is supposed to go in the middle, guys…
I’ve written a couple of other posts on the importance of being at a home build site. One issue was early on, before the concrete was poured and the other occurred during framing. This time, in the butler’s pantry the space over the sink is supposed to have a mirror (not the tile intended for the kitchen).
Tile removed… Oh, much better. (Sigh) 🙄
We spent 45 minutes walking around the house with the tile installers and Aracelli, selecting grout for the kitchen backsplash.
And we also selected the direction of the tile for the master bathroom, including the water closet and shower stall.
We also planned out the tile for the bar bathroom….
And the laundry room floor turned out beautifully, even without being grouted.
laundry room floor
The orange circle is a floor drain for the laundry room
And tile is underway in the guest bathroom as well.
Guest bathroom tub/shower
Unfortunately, even after all the walking around and talking about each room, another mistake was made. The tile installers put the master bathroom floor tile in the guest bathroom, which is supposed to have white and black hexagon tiles.
Wrong tile installed and then removed
As a result of the mistakes, it’s challenging to plan when to head back North to pack up and COVID-19 spiking again isn’t helping either. But I’m sure we will figure it out and get ‘er done. In the meantime, what do you think of the tile selections? We would love to hear from y’all! Stay safe, stay healthy, and thanks for stopping by! Hugs, Libby
As we get closer to when we can move into our new home we are also beginning to think of other projects we want/need to complete. And that includes a swimming pool. It’s Texas. It’s hot. In fact, as I write this on June 27th and look at the 15 day weather forecast, every day is forecasted to hit 90 degrees or above.
We’ve been waiting to go ahead with the pool until we sold our lake house up in Illinois. At one point in time we thought about keeping it and working from the lake during the hot summers, but cousin Callan pointed out some problems with that. First, you cannot just leave a house with a swimming pool for 3 months in Texas and expect it to be A-OK upon your return. Also, it isn’t like winter up north where everything just stops – the grass, weeds, and yaupon holly bushes keep growing, so we would need a yard guy. Add to that the stressors of maintaining a house 1,000 miles away (which we experienced this winter when a window broke at the lake cottage and we were trying to get it repaired while locked down from COVID-19), and the decision to sell was made.
Yay – we have a cash offer on the cottage!
Now that we have a contract to sell the lake cottage, we can look ahead to completing our forever home with a swimming pool. I think we will wait until the closing to sign the contract for the pool, just in case, but with a cash offer we are feeling pretty confident about the sale of the lake cottage. We’ve now received 3 bids for a swimming pool and have decided on the contractor we want to work with for this next phase of construction. Because of delays, it likely won’t be completed until mid-September, but thankfully we have a long swimming season here. Did I mention it gets hot here?
Looking at pool coping and tiles
We had previously met with Sam last fall to look at material options for the pool, so our most recent web meeting was to make sure that none of the house dimensions had changed and that we still liked the pool design we had discussed before. And we do.
Our pool will be 15′ wide by 30′ long with a tanning shelf and a spa on the far end. It’s what is called a sport pool – meaning there is no deep end. It ranges from 4′ deep to 5′ deep in the middle and is designed for shallow water activities and games. So it is perfect for volleyball or badminton or just swimming laps.
A side view of the pool depth
The pool will also have a bubbler and umbrella hole in the tanning shelf, as well as lights in the pool and spa. The spa will have benches on 3 sides and 6 jets. The color of the lights, the temperature of the spa, and pretty much anything else you can think of can all be controlled from an app on your phone, tablet or computer. It’s crazy.
So that’s where we are on pool planning. I grew up with a swimming pool and love to swim – this was definitely a non-negotiable for me. What do you think of the pool design? Would love to hear your ideas!
Sometimes in the home building journey you just have to celebrate the little things and remind yourself that, yes, things are progressing, even if slower than molasses. Case in point? I’m actually excited that the pad for the air conditioning units is framed up and ready for concrete.
And the plumbing for the master tub had to be fixed because it was plumbed on the joint wall to the shower – but in fact our tub has a center drain and faucet. So the concrete was jack hammered out and new plumbing has been put in place – ready for the floor tile, which is stacked in the living room.
before
after
It is fun to see our tub in the house at least – even if it isn’t in place yet.
master bathroom tub is here!
But our real celebration for today is that today is John’s and my 20th wedding anniversary. I really don’t know where those 20 years went – just crazy!
20 years ago today
Living in rental homes since November 2018 while selling our home(s) up in Illinois has been just part of our journey. I told John that the home building process feels like an initiation hazing. Going through the process/journey will make us value our completed home that much more!
Where did the years go?
I hope you all have little (or big) things to celebrate this week and thanks as always for stopping by.
Over the weekend John and I were pleasantly surprised to see that the pine headboard had been installed on the great room ceiling. I think the wood was stained back in April and we were wondering when it would go up.
John lounging on our ceiling. Photo taken on April 14, 2020.
We had already added wood to the living room trey ceiling and really liked it…
Living room ceiling
But we felt we should do something a bit more rustic for the great room, which is more masculine in feeling (especially once the stone is installed around the fireplace).
Great room with its new ceiling!
What do you think of the new ceiling? I can tell you that the acoustics are fantastic as John and I tried out the sound with some a cappella singing Sunday night (sorry, no video available). 😜
The backsplash tile is going up in the kitchen, which I’ll be happy to share with y’all as soon as it’s completed. In the meantime, thanks for stopping by.
Since painting was completed the next step in our journey was for the granite countertops to be fabricated and installed. This required that we go to the granite yard and approve our slabs.
Approving the slabs
With everything selected, installation could begin. Let’s start in the kitchen and butler’s pantry.
They also installed our kitchen and butler’s pantry sinks as well as the backsplash in the butlers pantry.
The guest bathrooms’ countertops were also installed.
And the outdoor kitchen countertop and sink were installed.
The bar countertops were also installed.
And finally, the master bathroom countertops and sinks.
I like the blue veining in the granite
We really like the bathroom countertops, but as I laid out one of the floor tiles, I realized that they are too busy together.
As John put it, the floor and shower tile are “not the same frequency”
So back we went to Araceli to look at simpler floor tile and brought samples back to look at in situ.
The only room that does not have a countertop is the laundry room, which will be butcher block. So that was some of our progress from the week. More posts to come soon!! We hope you and your family continue to stay healthy and safe.
The interior of the house was primed and painted this week, meaning that our painters (who have been with us for almost a month) are finally moving onto a new home. One last chance to make some gluten free cookies for Lee!
gluten free chocolate chip cookies with pecans
So with the cookies documented 😁, let’s look at the entryway, living room and dining room! The main wall color throughout the house is Sherwin Williams Kilim Beige (SW 6101). I wanted a non-gray neutral color to go with lots of other colors (hello oriental rugs).
Moving on into the kitchen, it’s great to see the cabinets uncovered again!
Looking into the library, you can see that we went much bolder. Originally, we got a quote for the entire room to have wood paneling. After seeing the estimate (ouch), we quickly decided we could make the room feel rich and cozy with paint. Actually, the inspiration for the color was our friends Bob and Libbie’s dining room in Grosse Pointe Farms, MI, which was a rich tobacco-colored brown. This one is Sherwin Williams Coconut Husk (SW 6111).
And looking into the master bedroom, we again went bold. I love chameleon colors that change depending upon the lighting. Almost like you get two paint colors for one. I also wanted to take the bedroom color into the master bath with a more spa-like vibe. This is such a big room with tall ceilings and multiple windows so I thought we should go darker (or risk the color looking like a child’s room pastel). Keep in mind, all the windows in the house have film over both the interior and exterior of the glass so the rooms will all be brighter once all construction is completed and those films have been peeled off. The color here is Sherwin Williams Riverway (SW 6222).
Now let’s move into the master bathroom and the water closet. I like how in this North facing room the wall color looks more blue near the master vanity.
By the way, there are a number of YouTube videos about various paint colors and which ones will work in your home (which depends greatly upon the lighting). Here is one I watched about SW Riverway:
Finishing the master Suite, even the closet (and other closets) were painted our trim color, Sherwin Williams Alabaster (SW 7008).
Ok, now we’ll briefly take a look at the two guest rooms, my office, and the pantry. All were painted the living/dining room and kitchen color, Sherwin Williams Kilim Beige. The closets and pantry (shown first below) were painted the SW Alabaster.
pantry
front guest room
view from the front guest room
on-suite guest room window seat
on suite guest room
my office
my office – corner window!
looking down to the living room
my office closet
At the end of the hall is the mud room and laundry room, again, painted SW Kilim Beige. I think the wall color looks warmer in the laundry room, which is a Southern facing room.
There are videos about Kilim Beige too! Although it makes me crazy that this woman and the guy above (who also has a video about Kilim Beige) both pronounce “Kilim” incorrectly. They pronounce it [KILL-em] when it should be pronounced like [kill-EEM]. Like the flat weave oriental rug. Duh! 🙄
Ok, now down to the great room! Here we warmed up the color a bit and used Sherwin Williams Whole Wheat (SW 6121). It’s a subtle shift in some of these pictures, but this color is much more golden and will go well with the red and orange shades that will be in our rugs and other furniture in this room.
We also have two guest bathrooms. The family bathroom with the white vanity was painted SW Kilim Beige while the bar bathroom, right off the bar and outdoor kitchen was painted the SW Whole Wheat.
And in the storage room off the great room are our doors and fireplace mantels (after the room was painted)
So that’s the interior of the house! I would have liked to paint the guest rooms, and especially my office, differently than the living/dining rooms, kitchen, and hall, but the contractors were going to charge us $500 a paint color switch. Not worth it and I can paint them later after we move in if I want. It was more important to have them paint the great room and master bedroom different colors – especially with their vaulted ceilings.
at the front door, looking in…
What do you think of the colors? I know it’s tough without flooring, rugs, furniture, and lighting. And our painter Mark flat out told me that he didn’t like the Riverway color in the bedroom, saying it was too dark – so you won’t offend me if you don’t like it. You aren’t the one who has to live there! 🤣
We hope you and your families continue to stay safe and wish you all a happy Memorial Day weekend. Hugs, Libby
Last week our painters stained all of our exterior doors. If you’ve been following along, you may remember that when the exterior of the house was painted, that crew mistakenly painted our exterior doors. Not what we wanted.
Guys, don’t paint the doors the house color!!
Much better!
Our doors are fiberglass, but are designed with a wood grain so they can be stained to look like wood. The look of wood without the maintenance of wood.
In progress
Inside the bar bath
We also finally got our front and mud room doors and side lights stained and installed. They look so much better than the plain temporary doors we had!
Temporary front door
Getting ready for the permanent door
Prepping for stain
Mud room door
Front door
Wrapped up and ready for interior paint
Finally, since the painters were on a roll (painting pun there), we had them stain the doors to the barn apartment and John’s work space.
Doors into the apartment and garage
Doors into the master bedroom
Stained and ready!
Now that the exterior doors are done, they have begun priming and painting. In fact, they should be done next week, so it will be fun to post pictures from that step in the progress! We hope you and your families continue to stay safe and healthy as states slowly begin reducing their lockdowns. As always, thanks for stopping by! Hugs, Libby
This is what my work looks like these days. That’s me in the top left…
Sorry I haven’t been posting. With the “new normal” and COVID-19 changing the way we work, I have been busier than ever. In the past month I’ve been training groups of 25-55 via Zoom in 4 hour blocks. The groups have participants from all over the US and Canada, as well as from Jamaica, Brazil, South Africa, Norway, Israel, Malaysia, and New Zealand. It’s quite the wild ride to train such diverse groups in 4 hour increments (with only two ten minute breaks) and it’s been very popular with more than 115 people joining the “Live Online” offering.
In the meantime, we’ve been prepping to get electrical power to the house. Yep, so far the entire house has been built using power from a generator. Of the entire house building process, this part has been the most frustrating, taxing, and downright unpleasant. After 4 months of back and forth, paying a neighbor $500 to sign the flipping paperwork to allow us to tie into a power pole on their property, we can finally move forward.
The power poles are now marked and will stop on the hill on the other side of the large oak in the photo below. From there it will be trenched underground up the hill so that tree can stay.
Hooray – you get to stay, big post oak in the pathway!
Once the power company comes out (which I hope will be very soon), it will still take 3 weeks until everything is done. Unfortunately, this is adding to delays on the project. Some work cannot be done until we have power, including installing the wood floors, which requires that the air conditioning be turned on to acclimate the wood to the environment prior to installation. When we signed our building contract last October, it was estimated that we would be in the house by May 1st. Now in mid-May, we are looking at 2 more months of construction and moving in mid-July. 🙁
But in the grand scheme of things, we are doing OK and are going to start packing up our rental house in anticipation of moving relatively soon. We’ve also had the chance to see our friends Betsy and Aldy on Mother’s Day and they brought us a beautiful “vase” of flowers from their garden, which we are still enjoying. We hope you are all doing well, and thanks again for stopping by!
This week I had a birthday and many thanks to those who remembered me and commented (thanks Lorri!) or sent me texts, emails, LinkedIn Messages, and Facebook posts. I appreciated everyone remembering!
Cuz Bill always has good ideas!
Cuz Bill sent me a text last week and suggested that the cousins get together to see progress on our house and have a socially distancing party. I thought it was a great idea, texted the cousins, looked at the weather forecast, and conveniently picked my birthday to host this family event for 8. Thankfully, our porch is 16′ wide and quite long, so it was not difficult to fit camp chairs for everyone on the porch.
We got catering from one of our favorite restaurants, the Front Room Wine Bar, which, like any restaurants still open, is only offering take out. John and I love this place and we have visited here many times before, including when our friend Matthew visited and it’s where we rung in New Year’s Eve!
Earlier in the day Travis, aka, Bestie, arrived with his beast of a machine to clear out our view. As I wrote in a former post, we lost most of our view of the valley as the trees leafed out. We wanted to keep any substantial trees, but those that would look like lollipops if trimmed had to go.
Travis makes quick work and the view was significantly enhanced from before…
before
To after an afternoon of work….
We also gave our family a tour of the home in small groups and some elected to wear masks inside the house. In addition to changes we shared with you in previous posts, one of the major purchases we made (and my first birthday gift of the day) was this set of antique Egyptian doors. We have decided to do a VERY light sanding, just to get any paint (which is likely lead based) that will potentially flake off and then cover them with a protective coat to keep their character. I love that they have frosted glass that will let light through, but also provide a bit of mystery at the end of the hall as you enter the great room.
The other progress is the new ceiling installed in the living room. It is the same “Texas Honey Brown” pine that is on the ceilings of the porches.
The pine beadboard for the great room is also all stained and sealed, and ready for installation in that room. We opted for the beadboard in the great room because we wanted something a bit more rustic and different to set this large room off from the others.
So that was my quarantine birthday at the ranch! Not too shabby, given the world circumstances. Thanks to sister-in-law Janet for the lovely birthday card and special thanks to my high school friend Miste for the card, awesome gift, AND subscribing to this blog! I hope you all continue to stay safe and thanks, as always, for stopping by.
Last week John and I met with the trim guy to discuss closets. Planning this out thoughtfully is super important. After all, closets aren’t just where you keep your jeans – it’s where you keep your dreams. 😜
sketched out closets
Two days later, and the shelves are already going in!
Master closet
Pantry
My office closet
Storage room in progress
Laundry room
More master closet
Storage room almost done
The window sills were also being installed and I’m really glad that we went with the stained window sills!
Interior doors were also installed… and then immediately taken down so they could be stained. Even the pocket doors to the master closet and the family bathroom were installed. Why? No idea! Most of the doors are 3 panel craftsman style, but we also picked up a couple special doors at antique stores (pre-covid) for a couple of special locations including our master bedroom and the laundry room.
And finally, baseboard and door trim was installed this week.
I’ll post more pictures of the doors once they are stained and re-hung. And more fun developments are coming!!! So thanks for stopping by and continue to stay safe and healthy!
Saturday, John and I went to the property and spent the afternoon working on the yard. We reflected that it really was the first time we worked on the property together. Partly because we got this new toy, errr, I mean tractor!
It fits perfectly in our new barn and it’s so easy to maneuver! I used it to pick up scrap wood from around the house while John built a 4’ X 4’ frame for a raised garden bed.
We decided it was a good time to start a garden off to the southern side of the house. I wanted it easily accessible and it made sense to put it off the mud and laundry room side of the house. It also needed a space that got at least 6 hours of full sun, which also limited our choices since we have so many trees.
Filling the bed and sectioning off the squares
I’m doing square foot gardening. It’s efficient, low maintenance, and simple for people who don’t want to spend a lot of time weeding and fussing in the garden. Instead of planting in rows, you treat every square as it’s own plot and plant 1, 4, 9, or 16 plants, depending upon its size. Tomato and pepper plants are planted 1 per square, while green onion seeds or carrots are 16 per square.
I also have a little plastic grid, the Seeding Square, which has holes that help make sure everything is planted evenly. Just poke the orange stick down into the soil as deep as directed on the seed packed, and plant the seeds into the hole, then cover up the hole and water. It included a color coded sheet that tells you how many of each plant goes into a square plot.
Seeding Square helps make gardening idiot proof for me
I’m not exactly sure how this garden will go… I’m used to gardening in USDA zone 5b and now we are in 8b – quite a difference! This little 4X4 garden has 4 different tomato plants, 4 types of pepper, 2 types of onions, green onions, Swiss chard, 2 types of lettuce, spinach, and 1 strawberry plant. We may be starting this too late for the spinach and lettuce because it is already regularly in the 70’s and 80’s, but we’ll see. I was surprised that I actually did get a little compost out of the compost pile we started in the fall. But the garden still needs more compost and I couldn’t get vermiculite at the local Ace hardware store, which helps the soil mix retain water. Finally, we need to build a lattice for the tomatoes and fence around the little plot so varmints don’t get our plants…. But overall I’m very pleased with our progress in just a few hours.
View of the garden from the mud room door
Laundry room window in the background
The other exterior progress we made is that the cedar brackets were added to the cedar posts on the front porch.
Before
After
We really like how it gives a more finished look to the cedar posts and beefs them up a bit.
On a more personal note, I spent Saturday thinking often of my oldest brother, Beau. He would have been 65 years old on Saturday, but passed away back in 2016. He loved being outdoors on his farm with his horses and dogs and his sudden passing was part of our inspiration to move to Texas and build this house and lifestyle. And with the current Covid-19 health crisis, I think it is more important than ever to live the life you want with those you love. John and I wish each of you a wonderful and healthy Easter Sunday. As always, thanks for stopping by!
Before I jump into this post, John and I hope you are all continuing to do well and stay safe during these challenging times.
Above, pics from March 31st, as cabinets were being prepped.
As mentioned in a previous post, it took us a while and 20 or so stain samples to get the right stain for our knotty alder cabinetry. Color finalized, our painters got to work and we really liked the shade, even before the 3 finishing protective coats were added.
They also finished painting and did the protective coat on the painted pieces.
But when they began doing the first of the three clear coats over the stain, things didn’t go so well. They called it a “blush”.
Because it has been so humid with thunderstorms almost every weekend (annoying when you want to get out of a little rental house and hike around!), the clear coat made these white and oily looking marks on most of the stained wood. They explained that it’s like when you leave a wet glass on wood and it leaves a white watermark – there was just too much moisture in the air. Options to fix included heat or chemicals. But they could fix it, Mark, our painter, assured me. No problem, I said. Do I look worried? I’m not worried….
Me, looking at the cabinets with the “blush”
That was a complete lie….
I realized it had been a while since I had baked anything for the contractors at the property, so I baked peanut butter cookies (not pictured) one week and oatmeal cookies (shown above) the next week. It was also a good excuse to visit the site and check on how the “fixing” was going. I think it was a lot of work, but Mark was true to his word…
They have also begun staining the outdoor kitchen, which is made from cypress wood. As Lee (the other half of our painting team) put it, the stain will disintegrate before anything happens to that cypress wood. Apparently, cypress is difficult to stain because the grain is so tight and water repellent.
Above is the stained cypress cabinetry, with no clear coat over yet. I’m hoping we don’t have the same “blush” problems, but I will do my best not to fret…. Next up will be staining interior doors and painting walls.
So that’s our progress for this week. Thanks for stopping by!
Two weeks ago we met with Araceli, who is our contractor’s main source for flooring, tile, and countertops. We have certain “allowances” or budget constraints within our contract that allows us to select from certain flooring, granites, tiles, etc. If we select other options, it will be an “overage” and we’ll pay extra for those options.
This was actually our third trip to see Araceli’s showroom, and we were easily able to agree again on our wood flooring – it’s a handscraped American Hickory Wood with a Chestnut Finish. Because we’re putting this over concrete, we are using engineered hard wood. This will be the third time we’ve installed engineered hardwood in a house – first the Lodge and then the Lake Cottage. So we’re very comfortable with this. And the fact that it has a lifetime structural warranty and a 50 year warranty on the finish doesn’t hurt either.
Moving onto the bar bathroom, we have boxes of left over tile from the Lake Cottage entryway and guest bathroom. When we purchased it, we intended to put it in the downstairs lake room (like a mudroom, but it walks out to the lake), but in the end we did something else for speed and economic reasons. As a result, we brought the excess tile down to Texas with us and took two pieces of tile and a piece of the bullnose to Araceli’s showroom as you see above. I like that this tile looks like slate and it will be in a bathroom that has a door directly to the pool porch.
Lake Cottage entryway
We also selected flooring for our master bathroom, family bathroom, and laundry room.
And we selected granite countertops for the kitchen, bar, and bathrooms.
Another bonus was that Araceli had our kitchen sink, and I was really happy to actually put my eyes on it!
So we are continuing to move ahead, even if at a slower pace right now. And honestly, it was a tiring 2 and a half hours – John ended up going outside and sitting in the car for the last half hour. We hope you are all doing well with your social distancing and sheltering at home. Thanks for stopping by and stay safe!!!
Color-coded house plans with all of our selections.
For a week of quarantine, quite a lot actually happened, which happily gives me fodder for several posts. Today I’ll focus on our staining and painting crew, Mark, his “Pop” Lee, and Luis.
First, as Mark explained, they remove every cabinet door, drawer, and shelf, label them, and set them up for spraying. Apparently they spray all the cabinetry, add a clear coat, and then reassemble the cabinets. Finally, they cover the cabinetry and paint the walls.
By the way, for those who voted on which door style to choose in this post, we selected A. More simple with a craftsman meets farmhouse feel.
Why is choosing a stain so difficult?
This means that we *have* to finalize our stain for the cabinets. This involved multiple trips to yet another paint store, where they would only allow one customer inside at a time, and on Friday, a trip back to Lockhart, TX for two more sample doors. As I picked up the extra sample doors, I told the employees at Dupert’s Cabinetry that I was being a bridezilla about the stain, to which Zach responded, “You only have one chance to get it right. And you have a LOT of cabinets if you get it wrong.” I found that to be reassuring and frightening in equal measure…
All stains look darker once sealed
Pre sealant – too dark
Pre sealant- definitely too dark
More like this cherry look?
Finally, by 3 pm, John and I agreed on a stain for all the stained wood cabinetry. We also decided to leave the cabinet interiors clear coated only with no stain (this does not apply to upper cabinets with glass fronts). This will provide some relief from the warmer and darker exterior of the cabinets and make it easier to see inside lower cabinets.
This does not look good…
Lee was also working on putting a gel stain on our exterior doors. Just to recap from a previous post, our exterior doors are fiberglass, meant to look like wood. And the exterior paint crew accidentally painted them the trim color. This really wasn’t going well at first (as seen above), until they decided to take the door down and spray it.
Top left, before, then after with our custom color.
Now we are getting the warm wood tones we like! And finally, we chose a stain for the yellow pine bead board for the great room ceiling.
Can’t wait to get the pine bead-board stained and on this ceiling!
The same stain on the great room ceiling bead-board will also be used on the wood of the various window sills, as previously mentioned in this post.
Examples of stained wood window sills
Meanwhile, as John and I worked with Mark to decide stains, Lee and Luis were working on all the woodwork that was going to be painted, and not stained.
The cabinets that are painted (technically, lacquered), are the laundry room, family bath vanity, and kitchen island. Mark explained that they prefer to use lacquer and not oil based paint because it’s more durable and dries faster. The “white” color, in case you are interested, is Sherwin-Williams 7008 Alabaster.
SW7008 in Chip and Joanna Gaines’ kitchen
You must understand that John hates white. White kitchens, walls, carpet, etc. I suppose he finds it devoid of the pigments he loves so much in his oriental rug collection? But SW 7008 Alabaster is, according to Sherwin-Williams, categorized as an off-white with subtle undertones of greige/beige, which honestly reads more like a creamy and crisp warm white in both interior and exterior lighting. It is just “off-white enough” to not be super bright white and is ideal for a softer white look. I mean, if Joanna Gaines uses it on her Shiplap walls, it’s got to be good, right??
Paint and stain materials galore
There should be lots of photo-worthy pics this coming week to share! Until then, thanks for stopping by!
As I write this on March 23, 2020 we are in the midst (and I hope not the beginnings) of a worldwide epidemic. Watching the “new normal” unfold with Corona virus has been odd for all of us and John and I hope that you and your families are healthy and safe.
I went grocery shopping two weeks ago, back when they were starting to suggest households have two weeks worth of food stocked up in case you need to quarantine yourself. Two weeks ago we were still talking about people on cruise ships being quarantined, not “shelter at home” for whole states. This was before everything from SXSW in Austin to most flights, all schools, every conference, concert, sporting event or gathering over 10 people was cancelled. At THAT time I went to the store to get supplies for two weeks as directed (but didn’t realize I should have stocked up on TP at the time – hmmm).
Brookshire Brothers grocery store in Smithville, TX
Today I went back and was shocked by how little was available on the shelves. Of course, no toilet paper, paper towels, or kleenex. But no broccoli, spinach, potatoes, zucchini, squash, or lemons. No milk, half and half, eggs, butter, or cheese. But weirdest yet in Texas – no tortillas? And no tortilla chips? Now I’m freaked.
My shopping cart. Not kidding.
But not to worry, I have my priorities straight and got all supplies we need for another 2-3 weeks. I hope.
In the meantime, not much happened at the house this past week except that we met with the septic guy, Shawn. We are installing an aerobic septic system that will take care of our needs from the house and the barn apartment. The benefits of the aerobic system is that the leach field is much smaller, it doesn’t smell, and the water, after being sanitized, is sprayed from sprinkler heads onto your lawn. From my limited reading, it seems that the aeration and disinfection stages are what makes it different from a traditional septic system. I’m hoping that Shawn will be able to begin work so that part of our home construction can continue. I’d hate for him to get behind in his work (sorry, I really couldn’t resist).
Wesley, our site supervisor, also dropped off (on the front porch) the stained sample door for us to look at and…….. I don’t like it. It’s too dark. Not enough gold? I don’t know. The above pics show the sample door against various pieces of furniture in our rental home, and it just isn’t quite right… Maybe I’m getting slap happy in this little rental house with John. So Wesley is going to try to get the paint/stain guy to see if he can lighten it up or they will take the sample can of stain back to Sherwin Williams (again) to see if they can get some more yellow in it to lighten it up.
As many have (according to what I’ve seen on Instagram, Pinterest, and my few forays back to Facebook), I’ve also begun giving our rental home a good cleaning. I like this book, The Complete of Clean, as it provides good advice not just for cleaning everything in your home, but also how to make your own cleaning solutions. They use natural ingredients like Pure Castile Liquid Soap (almond is my favorite scent), essential oils, vinegar, and rubbing alcohol. It’s actually been fun to create the various potions and the house really does smell great.
The new conceal carry in Texas?
As we wait things out, I hope you are all doing well. They began announcing this evening that Austin and Travis County will be under a “shelter in place” order beginning tomorrow. I don’t know what that will mean for our home building project (and of course, we don’t want anyone to get ill because they came to work at our house!), but then we don’t live in and are not building in Travis County.
Pic from Austin – they now allow mixed drinks delivered with food.
John and I are lucky that we can both do our jobs from home – although my work is changing drastically as I’m obviously not traveling like I did before. I traveled over 19,000 miles just in January and February of 2020. Now I’m trying to figure out how I can take a two-day live training program and make it interactive from my desk in a tiny town in Texas for people in British Columbia, Pennsylvania, and Ohio in the next three weeks. But as my grandmother would say, “I’m blessed with work.” Hope you all are as well and stay safe.
Well I must begin by saying, first, I hope all of you are safe and sound as the Corona Virus cancellations are really picking up speed. From SXSW in Austin and the Spring Antique Show in Round Top, to the St. Patrick’s Day Parades in various cities, to numerous conferences cancelled – this social isolation is impacting many of our friends and family. Personally, all of my travel going forward has been cancelled until further notice and the two international conferences where I was invited to speak this spring have been cancelled or postponed. John and I both hope that the cancellations do have the intended impact of “flattening the curve” – meaning that it may not stop everyone from becoming infected (eventually) with COVID-19, but it will elongate the period of time it takes for everyone to be infected, and thus reduce the strain on our hospitals and healthcare system.
A truck full of cabinets? Yes, please.
Moving onto happier topics, as mentioned in our last post, our cabinetry arrived and has been installed this week!
Me, seeing the cabinets.
No seriously. I think I squealed and did an awkward jump into the air. Even John commented, “You don’t usually look that dorky.” Thanks, honey.
Shall we go through room by room? Yes, let’s… Let’s start with the heart of the home – the kitchen. We are really glad we went with the upcharge for the cabinets up to the ceilings. What are we going to keep in those glass front cabinets up top? No idea, but it sure does look perrty…
Back of the hood
Drawer microwave and fridge space
Sink and dishwasher
Just off the kitchen is the Butler’s Pantry. It’s basically a little bar area as well as a dish storage haven. It’s like a bigger version of the bar at the lake cottage, for those of you who have been there.
Bar at the lake cottage
OK, maybe a much bigger version… Again, we really like these cabinets up to the ceiling. All the glass will be installed in the doors later, after they have been stained and varnished. All the wood (except for the outside kitchen) is knotty alder.
Moving into the library, John’s desk has been installed, as well as a wall of bookcases (a TV will be mounted in the middle section) and a corner set of bookcases too. These have file drawers on the one side for household documentation storage. I’m weirdly excited by this quirky little library/den. Makes me want to drive up North and get all of our books out of storage now!
The master bathroom and master closet also have cabinetry. In the master bathroom, we included built in medicine cabinets (again, the mirrors will be installed after staining and sealing), and I have a little vanity space as well. In the closet we included one built in (my antique dresser will also go in here).
The two other bathrooms have simple vanities. The vanity in the family bath (with a tub) will be painted, while the little one in the bar bathroom will be stained. The bar bathroom actually was designed to have a podium sink, and while I think they are lovely (we have one in our lower level bathroom at the lake cottage), they provide no storage at all. So we added this little two door vanity in at the last minute.
We also have a couple of built in benches. One is a window seat in the guest bedroom. I think this will be a lovely spot to sit and read a book, or it would be a great place for guests to get their suitcases up off the floor. The other bench is in our mudroom, right outside of our laundry room. It will be a place for us to sit and take off dirty shoes from hiking around the property.
Guest room window seat
Speaking of the laundry room, I’m loving this one. I’ve never had a laundry room with a window (our garden will eventually be on that side of the house – so it will be fun to look out at that). Here we did not opt to pay the extra money for the cabinetry to go to the ceiling, nor did we upgrade the drawers to soft close, but since it will only be John and myself using this room, I think it was a good place to economize.
The great room has two areas of cabinetry – the bar and the built ins around the fireplace. But first, our bar from the Lodge – the first bar we ever designed. It was a fantastic and often used focal point of the great room in our home of 20 years.
Bar from the Lodge
This one is a little bigger in length and about a foot bigger in depth. We decided to not be so squished between the front bar and back bar on this round. We also included some bottle drawers for the bar.
The bookcases on either side of the great room fireplace will hold our turntable, records, and maybe some games. There is a gap on either side of the fireplace because they will be installing stone around the fireplace all the way back.
And finally, the cabinetry for the outside kitchen was installed. At the end, we decided to cut out the exterior cooktop – John wants a grill/smoker and that cannot be put right next to the house. So instead, we opted to have a TV wall mounted here and it will be a nice place to put food out for a buffet (we have outlets for crockpots, hot plates, etc.) and it will have an outdoor refrigerator, sink, and garbage/recycling. The wood for the outside cabinetry is cypress. The front of this bar will be stone, matching the stone on the great room fireplace (inside) and chimney (outside).
The only other thing that was not delivered, was the living room mantle. It will look very similar to the bottom of the kitchen range hood.
Having the cabinetry in place has really helped us get a sense of the rooms, how we will functionally use them, and what we can see from various points of view (like the living room fireplace, for example). In short, it has really helped the shell of the house feel much more like a home. We know that trajectory will continue as the painters and stainers will be arriving Monday to begin painting everything (which is estimated to take two weeks).
With all that cabinetry, now you can see why we took so long to find a wood stain, right? There are a few painted pieces of cabinetry (although John is hesitant because, as he says, why would we paint such beautiful wood?), but the majority will be stained.
We’ve also decided to change our window sills from painted to stained. While the baseboards and trim around the doors will all be painted, we wanted to add a bit more of the stained wood look in at the windows. Above are a few examples we found on the internet (sorry – I don’t remember now where I found them so I cannot give photo credit).
So that’s our update for now. Stay safe and healthy and thanks for stopping by!
This week we were excited to see our new garage doors installed on the barn.
They are a little browner than we expected, but we were told that they will fade a smidge (is that the same as a just noticeable difference or jnd? Not sure…), so we are happy with the color we chose.
From the inside, you can see that the middle garage door will go straight up, giving John lots of headroom in his work space.
They also (finally) cleaned up the garbage from in front of our house.
It’s nice to take a photo of the house exterior and not have a mound of trash in the image…
We’ve also been spending lots of time at the local paint store. We’ve decided on the house colors, but finding the right color stain has been more challenging.
As we left the store today, I told the employee who has made us quart after quart of stain that I guessed he was hoping to never see us again. He smiled and replied, “I didn’t say that. You didn’t hear me say that.” My response was, “not out loud.” But it is really important to get the stain right because (drumroll, please) the cabinets arrived and were partially installed this week! And there are a lot of them, so the stain needs to be right from the beginning. But more on that later. In the meantime, thanks for stopping by!! Hugs, Libby
This weekend John and I began selecting paint colors and stains for the house. So. Many. Choices.
Kitchen looking towards the living room and front door.
Since we have a semi-open concept, we’ve decided to select one color for the living room, dining room, kitchen, butler’s pantry, hallway, laundry room, etc. This means that the color needs to go with a lot of different colors (and oriental rugs).
Colors 1 and 2 are the contenders for this large space. The last photo also shows a cabinet door we like from an antique piece of furniture we own. John wasn’t super pleased to see that antique Lilihan rug laid out in the dust, but trust me, it’s fine…
Great room options are 3 and 4
For the great room and bar bathroom, we wanted to do warmer and richer tones to compliment the stone we’ve selected for the fireplace and the slate-looking tile for the bathroom. Also, I typically like warmer (red and orange-based) accents in a bar rather than cool shades.
Another room we’d like painted differently is the library. There won’t be that much wall space showing with all the bookcases, but for the drywall that does show, we’d like a rich tobacco color that really makes the room feel rich and cozy. There are 4 windows in the small library, so I think the room can take such a saturated color.
And finally, we are trying to select a color for our master bedroom and bathroom. I was thinking of going for a spa-like feel, but to be honest, we are headed back to the drawing board because neither John nor I were terribly excited by these options.
Other than the wood stain consideration, we are trying to think through what colors will look nice with these stained glass windows that will go in our bedroom and bathroom (photos taken from our previous home).
Speaking of stained glass, we have a set of these 4 beauties for our great room windows too.
Pic from our previous home’s living room
Cousins Linda and Melanie stopped by on Sunday (with the men-folk) and gave me their votes, but I would love to hear what you think as well! Or if you have any color suggestions for our master bedroom and bathroom that will compliment those 3 windows above…
John’s find today – spear head?
By the way, while I was writing this blog post on the porch at the ranch, John was treasure hunting (aka, looking at rocks), and found this near where dozens of workers have been working. Crazy! Thanks for stopping by!
This week the mudding continued on all the drywall in the house. They are cranking through it because the cabinetry will be arriving next week. Hooray!!!!
We had to decide what texture we wanted on the walls and we chose the smoothest option, called orange peel. 🍊 Our builder also does curved corners on the corners of walls and cased openings, which we actually like.
Our wall options
The curved corners
The other big development this week is that the beam was removed. Why did we have to remove it? Well, as we got into the building process, we realized that rather than use this heavy beam, we could do scissor trusses in the ceiling and not have that heavy thing literally hanging over our head.
We also realized that our builder had put the same sized fireplace in the great room as the living room and master bedroom. Ooops – hey, that was supposed to be a larger firebox in the great room than in the other rooms. So, sorry, but we needed them to yank out the old, smaller firebox.
The 36” firebox
Pulling off the drywall
42” firebox
Out with the old and in with the new
Our chimneys also were capped, and finished this week.
Finally, the barn’s exterior is almost done as they worked on the soffit of the barn and cut openings for the light fixtures.
This weekend we will be deciding interior paint colors and stain colors for the cabinetry and exterior doors. Speaking of doors, we also ordered our interior doors, which will take 4 weeks to arrive.
So next we will post some paint samples as we get them on the sample boards. Let’s see what y’all like!
I’m not sure who is happier that I’m home from my recent trip to Whitehorse, Yukon Territory – me or John. Sometimes I’m just too far away…
John and I share our locations with each other, and on some of my long trips, it’s comforting to see where he is. So, no, it isn’t stalking… 😜
And it isn’t easy getting to or from the Yukon Territory. Adding to that, my flight from Vancouver to Dallas/Ft Worth was diverted to Denver to so they could remove an unruly passenger in handcuffs. So that was different…
But now that I’m home, it’s time to get focused on the ranch again and today I ordered all of our appliances. All of them.
It’s an exciting and slightly frightening experience to spend that much money at one time. And I double and triple checked the order again and again before finalizing everything. Wondering what’s coming?
Although I went back and forth on a separate cooktop and wall ovens, when I saw the ilve (pronounced ill-vay) range, I was sold. We will be receiving a 48” Italian ilve dual fuel range with double ovens and a full warming drawer. As you can see in the YouTube video above, it has lots of bells and whistles, plus we are getting the midnight blue range with brass accents. Gorgeous!!
And we are getting an LG refrigerator that makes craft ice (as shown in the video above). I wondered about the door in a door feature, but our friends Miste and Dennis say they really enjoy and use that feature in their refrigerator. And did I mention that it makes craft ice?
Other appliances include two panel-ready Bosch dishwashers (one for the kitchen and one for the bar), an ice maker for the bar, a small deep freezer for the pantry, and under counter refrigerators for the bar, butler’s pantry, and outdoor kitchen.
Tomorrow we will meet our site supervisor at the house to discuss the next phases of construction. But in the meantime, thanks for stopping by!
Well, I meant to get a post done Monday, on Presidents Day, but since I was only home for all of 27 hours (during which I slept, did laundry, repacked for a vastly different destination, and visited the home site), I’m now writing this on a plane.
What a difference a day makes. I did training in George Town, Cayman Islands (and tacked a few days on the beach on afterwards) and now am flying to Whitehorse, Yukon Territories, Canada. Above is a time stamp of the weather at the same time in the two locations.
First, Grand Cayman was beautiful and we celebrated John’s birthday and Valentine’s Day, in addition to my work.
At one island restaurant, The Wharf, guests were invited to feed the tarpons.
While 7 mile beach is beautiful and the weather was consistently 82 degrees and sunny everyday, John and I both found the island very expensive. Almost gouging. Especially the restaurants and the cabs (there is no Uber or Lyft). The one really nice meal we had was at Tille’s on St. Valentine’s Day.
Back home, we were anxious to see the progress at the house and barn, and we were not disappointed.
Living room fireplace
Living room
Looking into the dining room
Looking into the kitchen
Entryway looking into the library and bedroom
Library
Looking into the master bedroom
Looking into the master bathroom
Master bathroom
Master bedroom fireplace
Kitchen
Kitchen
Hallway
Behind the bar
Bar
Great room fireplace
Great room
Finally we can REALLY see the size of the rooms, even if we do miss being able to walk through the walls.
Umm, the beam IS coming out, right?
We are wondering when they are going to remove the beam from great room… And somewhere our master bathroom tub, tub faucet, and kitchen sink have been delivered, but Wesley must be keeping those items somewhere else for the time being.
The barn has recessed lights installed on the outside porches and they have begun the exterior soffits as well.
So that’s my short update from a quick trip home. Thanks again for stopping by!
Before leaving on yet another trip (which will be highlighted in my next post), John and I went by the farm to see the power path and other progress last Saturday.
The path that Travis cut for the power poles looks great and even if that isn’t the way we ultimately get our power, it will be a fun and easy path to get to the far east side of our property.
The barn is really coming along! The windows and doors (except for the big garage doors) are all in and the walls of the apartment are up. I think the living room will be a really nice size and I love the view off the private barn porch.
I also really like how the colors of the barn complement the colors of the house. I freaked a little, worrying that the barn is too close to the house, but John assures me that it will be very convenient for him as he works in his man cave, errr, I mean, barn.
Other progress included the drywall being installed on the ceilings and some of the walls. I didn’t stay in the house very much while they worked (seriously, these people should wear face masks with all that drywall dust), but I did see that the cement board is also installed around all of the shower/tub areas of the house as well.
It will be exciting to get back from this trip (which will cover John’s birthday and Valentine’s Day) and see the progress and other goodies that are getting delivered (I’m lookin’ at you, cast iron tub!). Until then, thanks for stopping by!
This week I’ve been on the road (or in the air) to Toronto for work. If you haven’t been, Toronto is a beautiful, clean, and safe city. It is Canada’s largest city – basically their NYC – but without all the crime or rude people. 🙂
In addition to doing two days of training, I also spoke at a conference about economic development and supporting small businesses. The conference included a reception at the Hockey Hall of Fame, which probably would have been more interesting if I actually followed or watched hockey. But I did hold a hockey stick for the first time in my life and play the interactive game – even scoring 3 out of 8 pucks!
Of course, while I’m away, work continues at the farm. One significant development is that the fireplaces were finally delivered and installed. Hooray! The living room and master bedroom fireplaces will be at the floor level, while the great room fireplace will have a raised hearth.
With the fireplaces installed and house truly dried in, now the drywall can begin. Oh man, does that mean I need to start selecting paint colors? Not ready!
While I was away John and Travis (aka, “bestie”) were clearing a path for the electrical cooperative to run their poles. Before I left, John and I hiked the path from our home and barn to the closest electrical pole on the neighbor’s yard. Then, with Travis, John decided whether to veer left or right to avoid the large oaks on the property. I’m really looking forward to getting back and hiking the path!
And of course, John found still more tooled ancient artifacts – this one just in front of the long porch!
So that’s our progress this week! I’m sure we’ll have lots more progress to share in the coming weeks. As always, thanks for stopping by and we’ll see you soon!
John and I have been visiting the house site most days and were surprised to find the roofers at work last Saturday. It was interesting watching the standing seam being created on the job site.
So what exactly is a standing seam roof and why did we choose to have one? Standing seam metal roofs are different from other metal roofs in that there are no exposed fasteners – they are hidden under the “standing seams” or vertical legs that rise over the panels flat areas. Easily one of the biggest benefits of standing seam metal roofing is the fact that no fasteners are visible on the surface, which means they aren’t exposed to UV, moisture, wind, and other elements that can cause a fastener to wear or fail over time. Also, standing seam systems don’t put holes in the panels that are protecting your home. Plus, some people see fastener heads as unsightly and this roof has a sleeker, smoother look.
Another benefit of this kind of roof is its longevity. As I’ve mentioned in previous posts, we are making choices that are intended to make our home as maintenance free for as long as possible. This roof has a 30 year warranty, but others have told us we can expect it to last 40 years or more.
And finally, this roof is energy efficient as it reflects back the sun’s rays and reduces the radiant heat that normal, asphalt shingle homes absorb – something that is important for hot Texas summers. It’s also fire resistant – another important consideration when building in an area of the country that is prone to wildfires.
Roofing on the house is done!
The downsides to this type of roof are that the roof costs more (maybe 30% more than a regular metal roof with exposed fasteners?) and takes longer to install as it is much more labor intensive. But overall, we are happy that we made this investment and won’t have to be worrying about leaks and replacing all of the fasteners in 7 years time.
The other significant progress this week was the barn construction. The exterior has been wrapped in the metal siding and the interior of the apartment has begun to be framed out. Seeing all the 2X4 framing feels like deja vu all over again.
Once again, mistakes were made, but this time we opted to roll with most of the aberrations and hopefully make those mistakes work for us. This mostly involved moving windows around and creating an entryway for the apartment so the door would fit. I’m not sure why they installed and framed some windows before the siding went up and why they will cut out the walls for others…
The barn is also getting a standing seam roof. I can’t believe they got all of this done in a week! Once the roof is on we will be able to move some items out of storage and into the garage. And it’s good timing too since we just ordered our master bathroom tub and kitchen sink.
What our garage doors will look like
Finally, we ordered our garage doors. Holy cow – those were expensive. Thankfully, they went on special, just in time for the big garage door expo, so we saved some money there. We really debated about the doors – do we punt and get something cheaper? But the doors will be visible from the (future) pool area as well as our master bedroom porch and they aren’t the kind of thing you upgrade in 2 years because even cheap garage doors aren’t really all that cheap. We ordered steel insulated doors that will make up to a 14 – 17 degree difference inside John’s work space. This was another “one and done” sort of house choice.
So that was our house progress this week. Drywall should begin next week (as soon as our fireplaces get delivered and installed) and the master bathroom tub will get delivered as well. Since I’ll be on the road (or more accurately, in the air) for work, I’ll have to rely on John to take photos for me. 🙏
Plumbing has been installed through the walls, including the exterior hose bibs and gas lines for the 3 fireplace gas starters and the gas oven range.
With plumbing, electricity, and low voltage 4K/speaker/internet WAPs run, the insulation has begun as well. It’s interesting, because most of the windows and doors have the glass covered for painting and the insulation makes the rooms feel much darker.
The job site has been a mess, pretty much from day one, but for some reason when I saw an open bag of Doritos and what I think is some ground meat from a burrito on the stack of drywall, I sort of hit my limit and began sweeping and cleaning. Seriously, do the crews have competitions as to who can be the biggest slobs? In the huge garbage pile out front we even found a pair of men’s size 10.5 sneakers.
“Before”
Come on peeps. I feel like I have a house full of teenage boys. Especially as I swept up empty cans of Budweiser…
After
But the cleaning up gave me an idea. I saw a suggestion on Pinterest and other blogs about building homes on which some people write sayings, quotes, or Bible scriptures on the wall studs or on the foundation (assuming it will be covered up by drywall or flooring) as a way to bless the house. I realized that there are many great literary and other quotes that are emblematic of how I want our home to look and feel. So here’s what I chose:
I saw the blessing above for a home and thought it would be perfect for our entryway. It says: May your walls know joy, may every room hold laughter, and every window open great possibilities.
For the library/John’s office, I chose this quote by C.S. Lewis: “Now at last they were beginning Chapter One of the Great Story no one on earth has ever read, which goes on forever; in which every chapter is better than the one before.”
For the Butler’s Pantry: ” Our homes should inspire us to go out into the world, to do great things, & then welcome us back for refreshment”
For the Master Bedroom, I chose a common quote for weddings: “I love you, not only for what you are, but for what I am when I am with you.”
In the Master Bathroom, a great quote by Coco Chanel: ” Beauty begins the moment you decide to be yourself”
And my favorite, by J.R.R. Tolkein from The Hobbit: “That house was a perfect house, whether you like food or sleep, or story-telling or singing, or just sitting and thinking best, or a pleasant mixture of them all. Merely to be there was a cure for weariness, fear, and sadness.”
So what would you choose as quotes that represent your home? I’ve thought about Walt Disney’s famous quote, “To all who come to this happy place, welcome.” – Maybe for a guest room? I would love to hear your thoughts and thanks for stopping by!
Yesterday we took a road trip to Lockhart, TX, the “BBQ capitol of Texas”, to make some cabinetry selections for the ranch. But first, barbecue!
There are multiple barbecue options in Lockhart and we selected Black’s Barbeque – the oldest restaurant in the state of Texas continuously run by the same family. Started in 1932, it is now run by the 5th generation and is open every day. The restaurant has also been highlighted in several TV shows from Food Paradise to Burgers, Brew, and Que, to Giana’s Weekend Getaway (Austin).
Don’t worry, we did not eat all of this or even 10%
After a great lunch of smoked chicken for me and brisket and sausage for John, we headed out to our cabinet makers location.
Master bathroom cabinets!
I was surprised how far along they are with the cabinets! They are made from knotty alder and I know from previous remodeling projects (hello lake cottage), that this wood has a slight pink/reddish hue and takes stain similarly to cherry wood. Not pictured is the outdoor kitchen, which will be made with cypress wood. Whoa – exotic!
Bar sink
Bar back
Library bookcases
Bar front
While at the cabinet maker’s shop, we had to make a couple of decisions. One – which door profile to choose and two – did we want exterior handles installed or fingertip groove pulls cut in to the doors and drawers. After discussing the handles a bit we quickly decided to have exterior handles added to the cabinets. Damon, our cabinet maker, warned us that we would see scratches in the cabinets with the fingertip grooves. We also discussed how the drawers with the soft close option and any appliances (especially dishwashers) are difficult to open without handles. I told Damon that I felt like Joanna Gaines (from the TV show Fixer Upper) in his shop and he is my Clint Harp!
That left us with the door and drawer profile choice. Which would you choose?
Above is option A – the “busted edge” profile.
Option B above is the “3/8 roundover” profile.
Finally, option C is the “ogee” profile.
Which is your choice? I’ll reveal our choice (actually, John’s – YES, sometimes I let John have his way…) when the cabinets are installed in 3 weeks time. Until then, I would love to hear your thoughts in the comments below. Thanks for stopping by!
This week is all about the various trades coming in, from the electrician (whose team was wiring away today,) to the TV/AV wiring team, to the plumber coming Thursday, and the roofer beginning this week. We met with the electrician yesterday and his team of 7 (?) was in full swing today.
Today we also walked through the house with the cabinet guys. The last time we met with them, John and I asked the cabinet guys to include some extras like taking the cabinets in the kitchen and bar up to the ceiling, as well as paneling in the library. Since then we got the total for those extras and let’s just say some of the extras were a bit more than we want to spend. So with today’s walk through, we made some significant cuts on the nice to have elements that halved the overage costs.
Editing cabinets
The HVAC has obviously begun and some of the interior posts and beams have been framed out as well.
Dining room
Beam & duct work
Master bedroom
Laundry room
And finally the painters also painted all the trim and the chimney stucco, so the standing seam roof can begin this week.
Gotta love the pile of garbage in front of the house (*sigh*), and with the recent severe storms over the weekend, we lost a few cedar trees. Thankfully nothing damaged the house or barn construction.
Thar she blows! All the damage we sustained from the severe weather last week.
Things are definitely hopping and it’s already been a busy week with house building decisions. Thanks for stopping by to check on our progress!!
Yesterday the drywall for the house was delivered as the exterior painters finished caulking all of the board and battens and the framers began working on the interior framing.
John pointed out that it had been a while (maybe early December?) since I had baked anything for the workers, so I made them a dutch chocolate cake with salted caramel icing. I also gave the painters a heads up to help themselves because I’m pretty sure Russell, one of the framers, could finish that entire cake by himself! 😃
Cake is served! It was gluten free, but they don’t need to know that!
The doors are now all installed, the new, non-supporting ceiling beam (long story for another post) was being installed, and the bar walls will begin soon.
Thankfully our builder can re-use this big beam since we opted to engineer the great room and master bedroom with scissor trusses instead of this heavy behemoth. Almost sounds like I know what I’m talking about, right?
Earlier this week we did a walk through with the sound, TV, internet, and security system wiring guy. Holy cow – the terminology is like another language from 4K to Cat6, 7, and 8, to 5.1 vs 8.1 surround in the great room… John and I are very lucky that we have friends with vocational and avocational interests in sound systems and they looked over and consulted with us about what we are doing (thanks Jet and Tommy!).
Outdoor speaker placement on the long porch
We have to fit that wiring in after the electrician but before dry wall. Things are really starting to move fast, and John and I are doing our best to keep our heads above water, as the saying goes. The electrician begins Monday, insulation goes in next Friday, and they sheet rock on Monday, 1/20/20. So we better get the stereo/tv/internet/security guy out there next Wed-Thursday, huh?
French doors to the dining room are finally installed!
But the big news is that they painted the house today. Before 1:30 pm…. Amazing.
By the way, that was color C for those of you who played my “Which color should I choose?” game. Although color C did get a vote on this blog (thanks Cuz Bill!), everyone on Instagram voted for D. But anyone who actually came to the home site voted for C (so don’t feel bad).
Above are pictures after a second coat had been applied. John and I like the body color but found that a BIG mistake had been made. The painters were mistakenly told to paint all the exterior doors (as seen below). Wrong! The exterior fiberglass doors have a fir wood finish so they can be gel stained to look like real wood doors. All the beauty of wood doors, none of the warping, shrinking, or maintenance. I immediately called our site supervisor and he assured me it will be fixed. Stay posted for that…
This is a major screw-up… but our builder immediately said they would remove the paint and it will be fixed.
I’ll try to stay on top of the barn construction as well since the windows were delivered today. Until then, thanks for stopping by!
While the framing, siding, soffits, and caulking wrap up on the ranch house, the metal structure, or red iron, of the barn has been constructed.
Caulking done on every batten on the siding
Although it is still just a metal shell, it’s provided us a chance to see the true size of the barn and how John can use it as his workshop, something he has never had before.
With the barn windows arriving this week on Thursday, the framing of the windows can begin and then the barn will be wrapped with the metal siding. As soon as the roof is on and it is “dried in”, we can move our belongings from storage (unfortunately located 1,000 miles away) to the barn as we wait for the house to be finished.
Looking back at the house from the barn
Looking at the barn apartment
The barn apartment will have it’s own porch looking into the woods, and I think it will be a great retreat and space for friends and family to use as home base for a week or so.
What do you think? When you (out of towners) visit, will you stay in the house or the barn apartment? Would love to hear your thoughts!
The framers are finishing the siding and porch ceilings, which is great – but it means that it’s time to choose our home’s exterior colors.
Private master bedroom porch
We have already chosen the colors for the barn. That was easy because there are far fewer choices for the metal building and we are NOT painting that bad boy.
Metal samples for the barn -the body will be the creamy beige and the sage green will be the accent color
We would like the house to go with the barn, but not necessarily match. We are also cognizant of our home on the hill sticking out when it is seen from the valley. I want it to be in harmony with the natural, wooded setting and with the cedar posts and other stained wood accents. So with that in mind, we are considering painting the house a shade of green with creamy beige trim – basically the opposite of the barn combination. We selected 4 color samples last week, but decided that they were all too light…
Original set of colors, 1-4
Round two colors were labeled A, B, C, D.
I immediately determined that color A from round two is too dark. So that leaves us with B, C, and D.
The standing seam metal roof will go on after the house is painted
What is your vote? They will start painting in the next week, so I’d love to hear your opinion! As always, thanks for stopping by! Hugs, Libby
We are back in Texas and today John and I walked through the house and marked on the wall studs where we want switches to control certain lights or fans. It’s really all about the user experience. How do you turn on enough lights to get safely to the kitchen in a darkened house, for example? Do you want to be able to turn on hall lights from both ends of the hall? Yes, by the way. I’m hoping our preparations will make the electrical walk through Thursday morning go much faster.
Looking into the kitchen
The front porch now has its ceiling done and the cedar posts are in place. The batten is also being installed on our Hardie board and the chimneys have been stuccoed.
Living room chimney
Loving the stained wood ceiling
We are also beginning to look at exterior house colors. I’ve painted a few swatches on the siding and we are debating looking at more color options.
Tonight we are looking forward to walking to a local restaurant and bar for a fun New Years Eve. Our ability to walk to restaurants, shops, and a local grocery store is one of our favorite things about living in our rental home in Smithville, Texas. We will definitely miss that when we move into our forever home on 43.5 acres, because, yikes, that would be a long walk.
Celebrating New Years Eve at the Front Room Wine Bar at their black and white party.
On our drive down to Texas (it takes 16 hours), John and I reflected on 2019 and looked forward to 2020. It was a good exercise in mindfulness and conscious living. I think of it as a way to slow down, reminisce about our favorite moments, make sure we take the time to appreciate all the little and big things that were a part of our lives in the past year, and also to draw some conclusions about which kinds of things make us happy and which don’t. My goal was to start seeing more clearly and confidently what are our goals & intentions for 2020.
John looking dapper on NYE. I think this should be his new LinkedIn picture.
Maybe some of these questions will be a fun conversation starter for you and your family too.
Reflecting on 2019
What 3 words would you use to describe 2019?
What was your favorite destination in 2019?
What was your biggest lesson of the year?
What are you most proud of from 2019?
What was your favorite compliment from this year?
What worry turned out to be completely unnecessary?
What or who had the biggest positive impact on your life this year?
Looking forward to 2020
What do you want the overarching theme of 2020 to be?
What are your biggest goals for 2020?
What skills do you want to learn, improve or master?
Which personal quality do you want to develop or strengthen?
What do you want your everyday life to be like?
What do you want to achieve with your career?
How do you want to remember the year 2020 when you look back on it 10/20/50 years from now?
Me in my vintage fur stole
I hope that you and your family have a wonderful start to the new year and new decade. Thanks for stopping by and Happy New Year!
We enjoyed a wonderful week in the Midwest, seeing many friends and family members. In fact every lunch and dinner was booked with different groups of friends or family from Saturday to Saturday (why do I suddenly want to sing the song Popular from Wicked?). And we lucked out with incredibly mild weather for the Midwest. In the 60’s for Christmas week? Crazy!
Mom and me
But I’m also thinking ahead to when we get back to Texas and will be walking through the house with the electrician to plan out all lights, outlets, and switches. Our current rental house in Texas has a few oddly placed switches – on the hinge side of a door instead of on the latch side – so I know how this can be important. It also seems like I struggle to find outlets for plugging in the vacuum or so we can charge a phone.
Outdoor lighting is wired
For an outdoor fan
Wiring done as the porch ceiling goes on
Under the pool porch
We’ve already planned out the lights and fans on the porches because the framers were going to install the porch ceilings while we were away. We also added some outlets into the porch soffits for Christmas lights and those are all wired to a closet so we will be able to turn off the outdoor Christmas with the flick of a switch. They are wired to a closet so they don’t clutter an area that will have several switches already (and have guests flipping it on and off saying, what does this switch do?).
Outlets under the soffits
So here’s my list of outlets I think we need. Let me know if you can think of any others.
External Outlets
front (long view) porch
pool side porch
private porch off the master bedroom
outdoor kitchen island
Kitchen/pantry Outlets
under cabinets (see pic below)
on either side of the island
inside pantry for small deep freezer
inside an appliance garage for blender, toaster, etc.
Photo from Houzz
Living/great Room Outlets
on mantles for holiday decor
under the windows
in the floor for lamps near couches (already planned out)
Fall decor on the lake cottage mantle
Bathroom Outlets
inside the medicine cabinets for electric toothbrushes and shavers
inside the vanity for hair dryers, etc.
in the water closet for a nightlight or a fancy toilet (still debating that)
Bedroom Outlets
behind nightstands for lights and chargers – with quad outlets
inside master bedroom closet for an iron
in office for computer, monitor, and printer
Anything else you think I should add to the outlet list? Any advice regarding switches? Let me know in the comments below! And thanks for stopping by!
John and I have traveled back to the Midwest to see family and friends. While we are really excited to see many of our loved ones, we are sorry to miss any of the building developments – especially as there are exciting updates everyday.
All the windows were installed this week, so the process of getting the house “dried in” has made great progress. “Dry-In” means that the building shell has been completed sufficiently to keep out wind, rain, or the weather in general, thus assuring that weather-sensitive materials or work can begin indoors without those materials suffering weather damage.
Primed Hardie Siding going up
The primed Hardie board and batten siding has also been going up. You’ve probably heard of Hardie Board if you ever watched the TV show Fixer Upper, as they frequently used it on their renovations. A big benefit of this siding is it’s durability.
Hardie board’s unique blend of concrete and other composite materials makes it impervious to elements like rain, high winds, and humidity. It also is highly resistant to hail and flying debris and is a very low maintenance siding.
One big key to the longevity is that cement does not retain moisture, so this siding never rots, swells or warps. It’s also fire resistant.
Unstained doors are being installed
Most of the exterior doors were also installed this week. All the exterior doors are fiberglass with a simulated fir wood exterior that can be stained. Like the Hardie siding, we opted for stained fiberglass doors for durability and minimal maintenance.
Finally, we did our exterior electrical walk through and the outdoor outlet boxes, light, flood light, and fan wiring was all run so they could begin adding the ceiling to the outdoor porches.
We are excited to see all the developments when we return, which will be significant! By the time we return the house will be fully “dried in” and ready to be painted. The red iron of the barn will be in place so we’ll get to see the bones of the barn. And immediately upon our return we will have to do our interior electrical walk through and cabinetry walk through, which our builder warned us will take hours if not entire days. Wow, right?
Be on the lookout for a post asking for ideas about outlet placements and cabinetry ideas. Until then, thanks for stopping by!
In addition to building our home, we are building a detached 3 car garage/barn. As a Midwesterner, it took me a while to get used to not having an attached garage, but then I realized that almost everyone we know in Texas has a detached garage. Oh right, they don’t get snowed in down here…
Trenching for beams (footers) has begun for the barn.
Knowing that most often our cars will be parked outside (as they have been for the year we have lived here), we were able to make different decisions about the garage. The main choice was to make it a woodworking space for John, something he has never really had. Considering how many things he has built over the almost 24 years we’ve been together (decks, docks, shelving units, tables, benches, beds, and most recently owl nest boxes), it’s time. The barn will, of course, have electricity, but will also have running water for a utility sink and more.
The other feature of the barn is a small apartment for those guests who prefer more privacy or who want to stay for an extended period of time. We love having company, and we’ve already had guests stay for a week in our little rental house. That’s great, but I couldn’t take the week off because I had just used vacation days for our recent move, and we realized it would have been desirable to have a more separate space for those using our home as a home base while exploring central Texas.
The apartment will be very efficient- 2 bedrooms and a full bathroom (with a tub for families with little ones), a kitchenette, and living room – all in 600 square feet. From inside the garage, the apartment will also afford attic storage so we can put seasonal and other long term storage above the apartment.
Front porch for the apartment with a freshly poured foundation
We also added a 10 foot deep porch off the apartment to extend the apartment and give folks a private space to hang out while outside (it faces away from the house).
View into the woods from the apartment
The foundation was poured on an unusually warm day, just ahead of a cold front. It was great having a sunny day to visit the foundation and see where the garage doors will be located. And yes, we are wearing shorts on December 9th…
3 Garage doors are carved out for John’s work space
One aspect that was challenging was where to place the barn in relation to the house. First, I wanted to pull up and see the house before seeing the barn. Second, I didn’t want it to dominate the view from the back, poolside porch. But I also wanted it close enough to the house so it wouldn’t be inconvenient to walk to it on a daily basis. We also didn’t want to wipe out any oak trees for the barn. Finally, the topography had to be considered – we are building our home on top of a dome or mound – meaning that the ground slopes down from the home site on almost every side. This meant that we couldn’t put the barn too far away from the house (unless we wanted a barn on stilts) and as it is the barn contractor had to bring in dirt to make the location we chose level for the barn foundation.
View of the barn from the great room
View of the house from the barn
The dirt they brought in has now been graded around the barn
As soon as the barn foundation has cured, the metal beams, called red iron steel, will be installed. The barn construction will be very different from the house as it is a metal building, and therefore will be completed much faster. I believe they pre-fabricate all the walls and basically wrap the beams like a present.
I like how the barn almost has an infinity look because of how the land slopes away from it.
What would be your “must haves” in a barn or garage? If you come visit, will you stay in the barn apartment or in one of the guest rooms in the house? Let me know in the comments below (if you don’t see the comments below, click on the post title to go to the full post). And don’t forget to subscribe if you’d like to see more of our progress – you will only receive notifications when we upload to the blog.